This technical writing sample is based on my personal use of Whisper Desktop, aimed at the casual user.
- Whisper Desktop Version:
1.12 - Tested on: Windows 10 Build 19045
This guide describes how to install and use Whisper Desktop, a Windows application for the Whisper speech-to-text model by OpenAI.
Whisper Desktop is suitable for podcasters, remote workers, students, journalists, and many other roles.
The app provides audio/video transcription without the complexity or cost of cloud services.
Note: This guide assumes basic familiarity with downloading and extracting files.
Install on Windows
Whisper Desktop runs on Windows. It also works on macOS and Linux using Wine. However, this guide focuses on Windows installations.
Side Note: For macOS and Linux users
Whisper Desktop requires DirectX 11 to run. On non-Windows systems, use Wine with fallback support for D3D11. For details, see GitHub Issue #42.
Running Whisper Desktop on Windows
Step 1: Download the application
- Navigate to the download location: Whisper Desktop’s Github releases page.
- Click Releases on the right hand side of the page.
- Find and download the file labeled
WhisperDesktop.zipfile.
 Above: Where to find the newest release of
 WhisperDesktop.zip from the project’s Github page.
Step 2: Extract the Files
- To extract the files, right-click the
WhisperDesktop.zipfile in your Downloads folder. - Select Extract All.
- Move the extracted contents to
C:\Whisper Desktopor a location of your choice. - Launch
WhisperDesktop.exe
When launching WhisperDesktop.exe, you might see a warning message pop-up. This is expected.
The app requires downloading a model to run. The guide explains how to resolve this in the next step.
 Above: The warning message pop-up that displays when running Whisper Desktop for the first time.
Step 3: Download a Model
Whisper Desktop requires a language model file to function.
Recommended
Use the
ggml-medium.binfor a balance of speed, size, and accuracy. 💾 For the direct download of this model, visit the ggml-medium.bin page.
Note: (Advanced Users) You can find more models at the Hugging Face directory.
- Visit the Hugging Face ggml-medium.bin page.
- Click the download button at the Hugging face
ggml-medium.binmodel page.
- Move the downloaded model into the same folder as
WhisperDesktop.exe(For example:C:\Whisper Desktop)
Step 4: Load the Model
- Within Whisper Desktop, click the browse (
...) button next to Model Path. - Select the model file (
ggml-medium.bin). - To load the model, click OK.
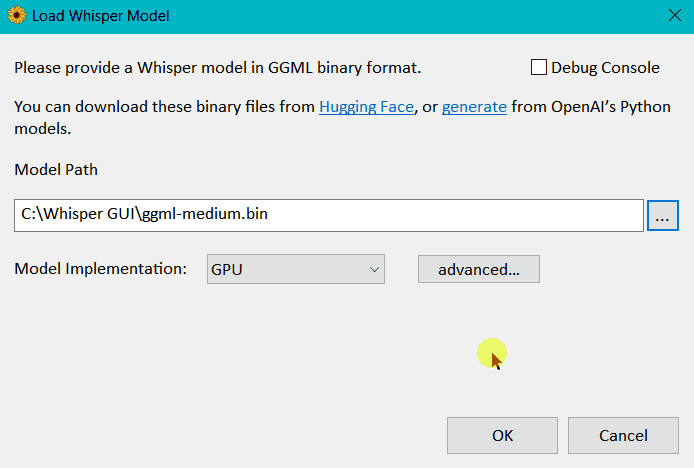 Above: Expected behavior of the app loading the model, once you click OK.
Transcribe Your First File
After loading your model, you’ll see a new interface.
Language Support
Whisper defaults to English yet supports many languages. This guide does not cover multilingual support.
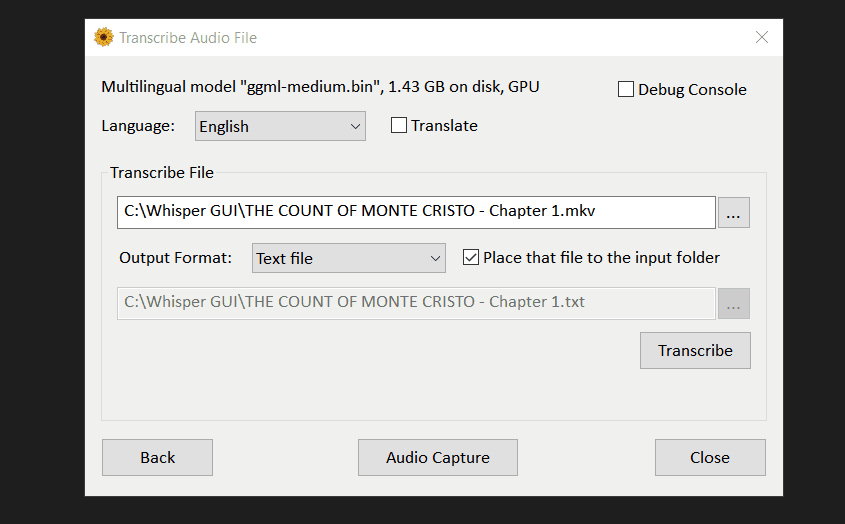
Step 1: Load Your File
- Click on the browse (
...) button next to Transcribe File. - Select your desired audio or video file. Supported formats include
.mp3,.mp4,.wav, and.mkv, and others. - Select the Place that file to the input folder checkbox to simplify file organization.
Step 2: Transcribe the File
- Select your desired Output Format from the dropdown menu. The choices are:
Text fileText with timestampsSubRip subtitlesWebVTT subtitles
- To begin transcribing the file, click the Transcribe button.
![]() _Above: Browsing to select an example video file, selecting Place that file to the input folder, and clicking the Transcribe button. _
_Above: Browsing to select an example video file, selecting Place that file to the input folder, and clicking the Transcribe button. _
- (Optional) To view the real-time transcription output in a separate window, select the Debug Console checkbox in the top-right area of the Transcribe Audio File interface.
 _ Above: An example preview within the Debug Console._
Note: The Debug Console is helpful to see the accuracy and speed of your current transcription.
Step 3: Review the Output
- When the transcription finishes, a Transcribe Complete pop-up appears. Click OK.
![]() Above: An example of the Transcribe Completed pop-up.
Above: An example of the Transcribe Completed pop-up.
- Your transcription file should have appeared in your chosen output folder.
- To review the transcript, open the file.
Benefits of Whisper Desktop
No dependencies needed
Whisper Desktop is a stand-alone application.
Simple Interface
Load your file, choose a model, and start transcribing.
Cost-effective
Whisper Desktop is free and does not need a subscription.
Privacy-first
All transcriptions are local. Whisper Desktop uploads nothing to the cloud.
Comparison: Whisper Desktop vs Otter.ai
| Feature | Whisper Desktop | Otter (Paid Version) |
|---|---|---|
| Cost | Free | $12.99/month |
| Ease of Use | No setup required | User-friendly, requires account |
| Accuracy | High, model-dependent | Very high |
| Model Customization | Whisper models only | Offers advanced settings |
| Language Support | Supports many languages | Wide language support |
| Collaboration | Not supported | Team sharing, editing |
| Speaker ID | Not supported | Supported |
If you don’t need speaker identification or team collaboration, Whisper Desktop is a great alternative.
FAQ’s
What is a Whisper model?
Whisper models are machine learning models that convert audio into text. They support transcription and translation features.
Why not use OpenAI’s official models?
Whisper Desktop needs custom, converted models due to differing programming languages. (Whisper Desktop was created with C++)
Can I use newer Whisper-compatible
ggmlmodels?Some users have reported success using modified models, but their reliability is not guaranteed.
For details, see GitHub Issue #188.
Troubleshooting: Something isn't working.
For known issues and solutions, visit the Whisper Desktop’s GitHub issue tracker.
Note: The project hasn’t recently received updates, yet has an active user community.
Final Notes
Whisper Desktop makes accurate, private, and free transcription accessible to everyone, with no tech skills needed. The app is a practical tool for audio and video transcription, whether you’re a student, creator, or professional.
If this guide helped you in some way or you’d like to reach out, give me a shout using the form on my contact page.